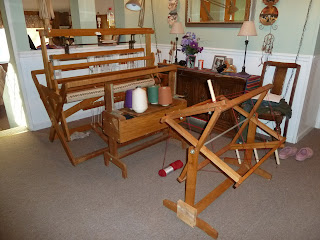
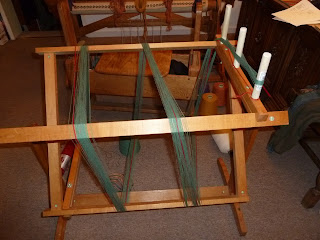
When I blogged last, the warp had been wound and ready to sley through the reed, and thread. I did most of it last night, leaving about 2 inches to do this morning. After completing that, I started beaming the warp.
1st learning opportunity: When doing warp stripes, wind the warp in the stripes or wind each section individually – blending in the reed kind of sucks.
After tying extensions (more on those later…) to the warp beam, I tied the warp to them. Fortunately, I realized that I hadn’t put the warp over the back beam before I started winding on! It was easy to fix, as the extensions loop around a rod that is removable. First crisis averted.2nd learning opportunity: I found several warps that I had passed under the heddle eye (I have Texsolv heddles), so I fixed those. Second crisis potentially averted.
3rd learning opportunity: I normally tie onto the apron rod, as I use that for part of the fringe for whatever I’m making. Dishtowels don’t have fringe. I was ready to start weaving, but the tension was completely wonky. I took it all apart, and lashed onto the apron rod instead. Much better, and 3rd crisis averted.
4th learning opportunity: When I started again with some roving to spread the warp, I realized that there were some funky warps not quite opening in the shed. Closer inspection showed that there were quite a few (4 or 5) warps that were crossed in the heddles. I fixed those, and then found a threading error about 1 inch in from the left selvage. Fixed that. Found another problem about 4 inches in from the left selvage – fixed that, I thought. Turned out the threading was still funky, but if we wanted perfection, we wouldn’t weave, would we?
5th learning opportunity: I had a couple of warp threads that broke when I was beaming the warp. As the tied spot came up, I fixed them like a regular broken warp. There were a couple of others that broke, so I got lots of practice fixing warp breaks.
6th learning opportunity: I got to the end, and one entire warp bundle came loose from the warp beam. Now, I’ve been known to put things together on the fly, and this was an opportunity to earn my middle name of Macgyver (according to LindaLou). I remember now – this loom needs extensions that are almost 1 yard long. So, I fixed it. While the warp was relaxed, I made longer ones, wound them around the beam so that there was more length, and tied the warp bundles, tensioning them as best as I could. This picture shows the problem and the fix:
I kept weaving, eeking out the last towel. Here’s how close I got to the heddles from the back:
And here’s the end – the white line is glue to hold the fell together when I cut it off tomorrow. Each towel is divided from the next with a contrasting weft. When I cut it off the loom tomorrow, I’ll zig-zag each end, and between each towel on each side of the contrasting weft. Then, the whole shootin’ match will go in the washer and dryer. I’ll iron them after hemming.
The completed towels will be posted for your viewing pleasure early next week.
Also, I worked on developing my shuttle throwing technique. I weave very fast, but I know that I’m not a very efficient weaver. I follow Laura Fry’s blog – she is an inspiration to me, and I learn something from almost every blog post she has. She posted a video some time ago on how she throws the shuttle. I did it!! It does have fewer movements to accomplish the job. I was pretty pleased with myself.
I’m looking forward to doing more on this loom – it’s a “Murphy” loom. Made by Charlie Murphy in Seattle, WA, probably in the 20’s or 30’s, it is a 4-shaft counterbalance. The cool thing is that the counterbalance mechanism is bike sprockets and bike chain with ball bearings. It’s very, very smooth, and with the Texsolv heddles, relatively quiet.
Boy, am I glad I had such great opportunities today. You know the best part, though? I never threw up my hands in frustration, or said bad words (ok, maybe I said a few) – I just dealt with the problem and kept weaving.


